My latest One Room Challenge project is now ‘in the can,’ so to speak. Eamon’s big boy bedroom is complete, and he is now sleeping in it! It is such a relief to have finished it. We photographed it on Friday of last week, and I revealed it to him that morning (he slept in the guest bedroom the night before while I worked away to complete and style the space for the photo shoot into the wee hours of the morning).
As you may know, Eamon has a big brother, Quinlan, and if you have more than one child, you will undoubtedly have witnessed sibling jealousy -slash- perceived egregious unfairness. When we did the reveal, of course the first thing Quinlan said (aka whined) was, when are you going to do this to my room? Um…I already did. I had to pull up the photos of what his room used to look like. And in doing so, I realized that I don’t think I ever have posted on the blog pictures of his nursery in our current home, or the evolved big boy bedroom he now has, which I did about four years ago.
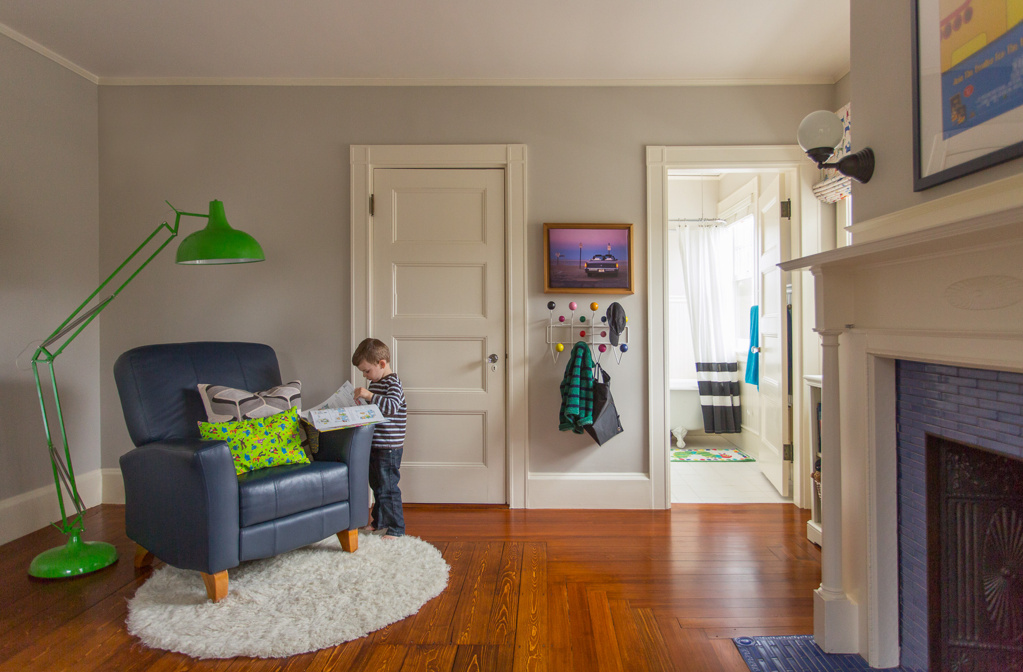
Here is what it looked like when we first moved in and got established in our home. He was about 18 months old, and still rocking it in his crib.
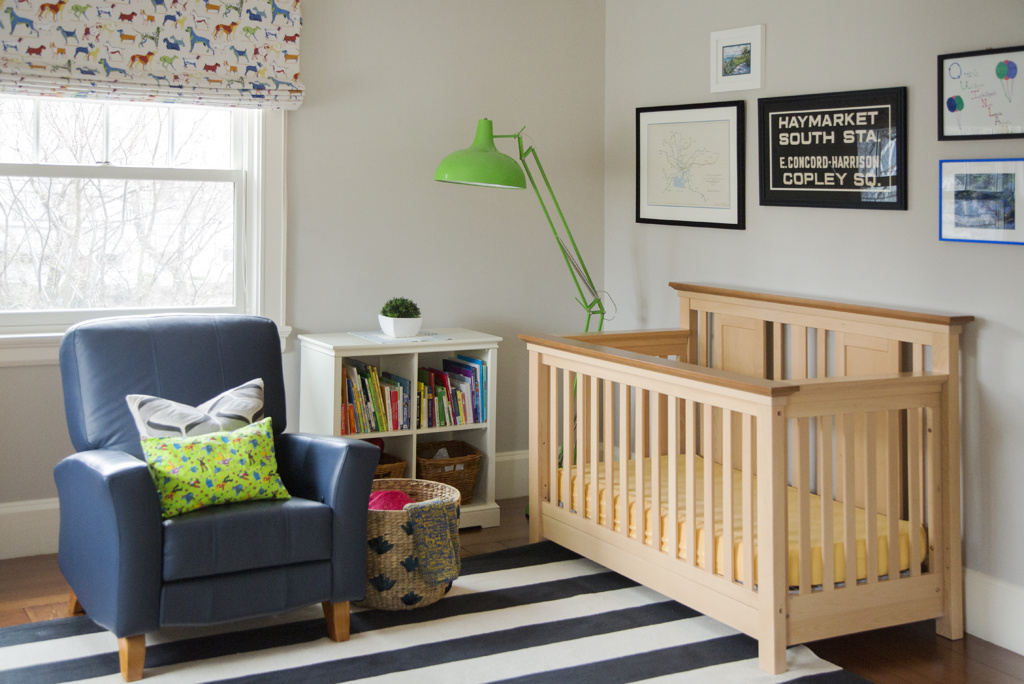
Remember that all of this furniture was purchased eight years ago, before I had any inkling or even a twinkle in my eye about having a career (or even a hobby) in interior design. 🙂 I positioned the crib where I knew we would want to put the bed, so I could hang the gallery wall and know I wouldn’t need to move it and do it all over again in a year. We used a large (8×10) area rug with a full-sized bed in mind.
When it came time to move up from the crib, it was a relatively easy change. We had purchased the bed conversion kit (rails) with the crib – actually, we thought we had bought the toddler bed conversion, and were surprised when we opened up the packaging that had been in storage all that time, and found full bed rails inside!
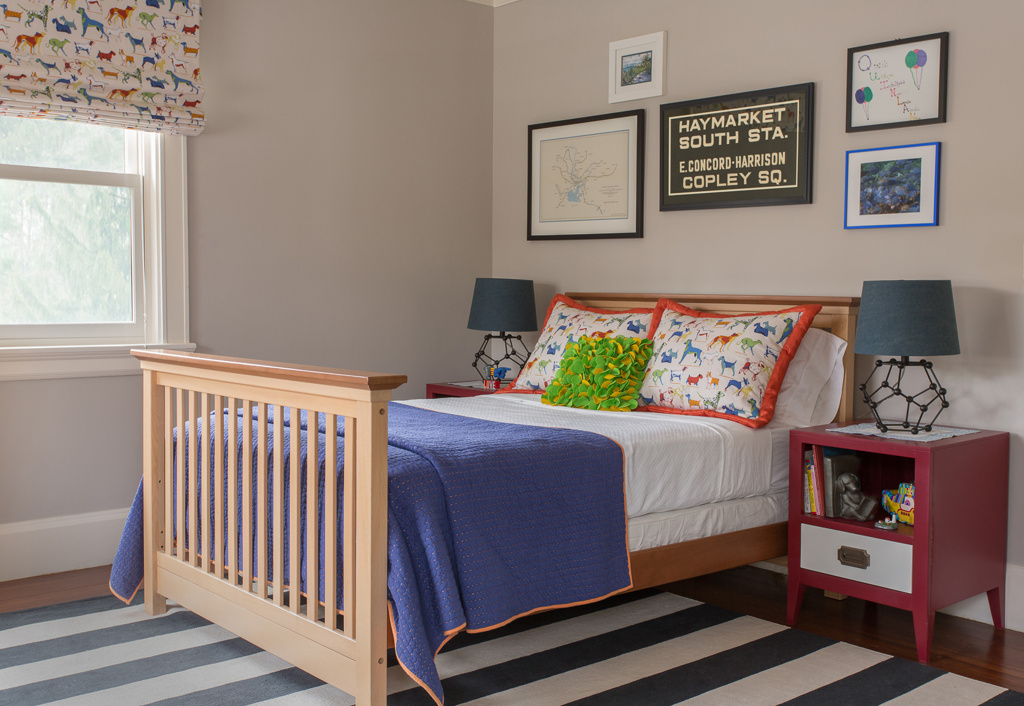
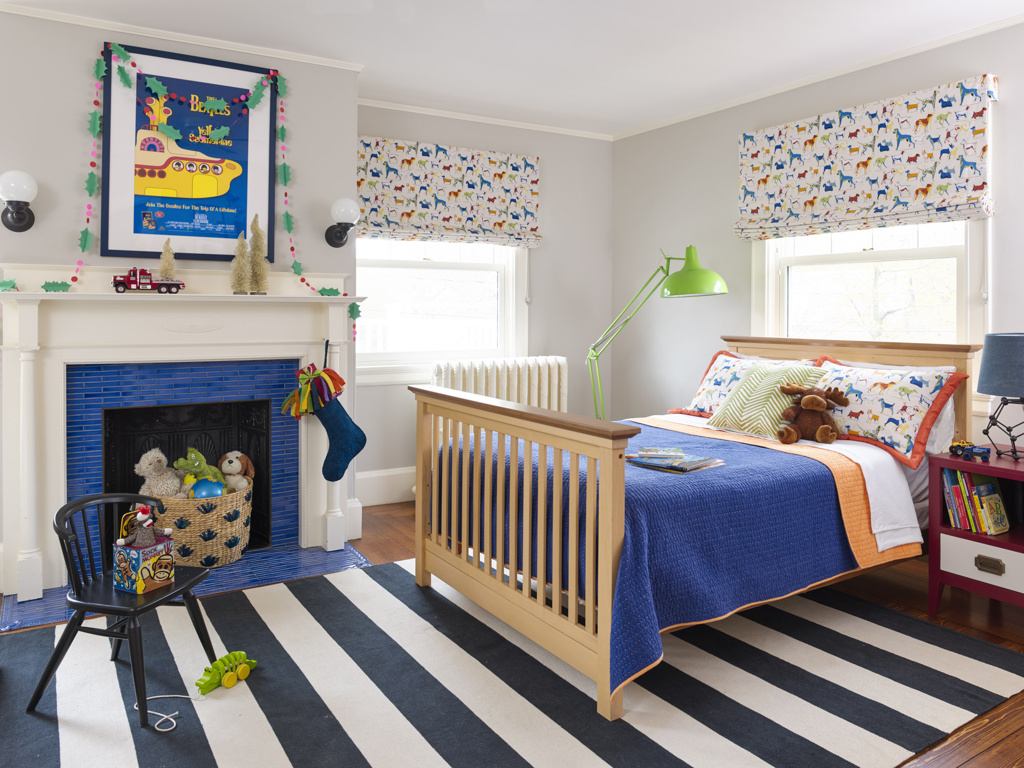
Just add cute bedding (made some shams with fabric left over from the Roman shades), nightstands, and table lamps and voila! Big boy bedroom.
We moved the glider/recliner and bookcase to the other side of the room to make room for the bed, but didn’t move the dresser (that would have been much more of a pain – solid wood furniture is super heavy!). The glider is still there today, despite my efforts to convince him a small desk and chair might be more useful. He reads a lot in his room, but 99% of the time he reads in bed. Or standing next to it. Or hanging off of it. Even during ‘sedentary’ activities like reading, he is in perpetual motion!
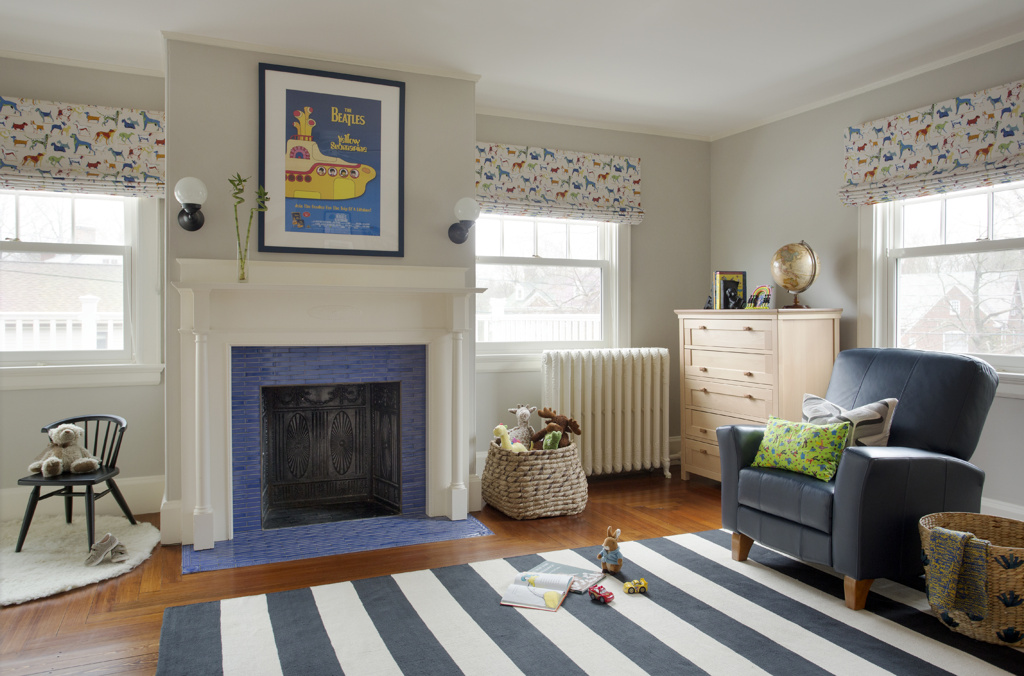
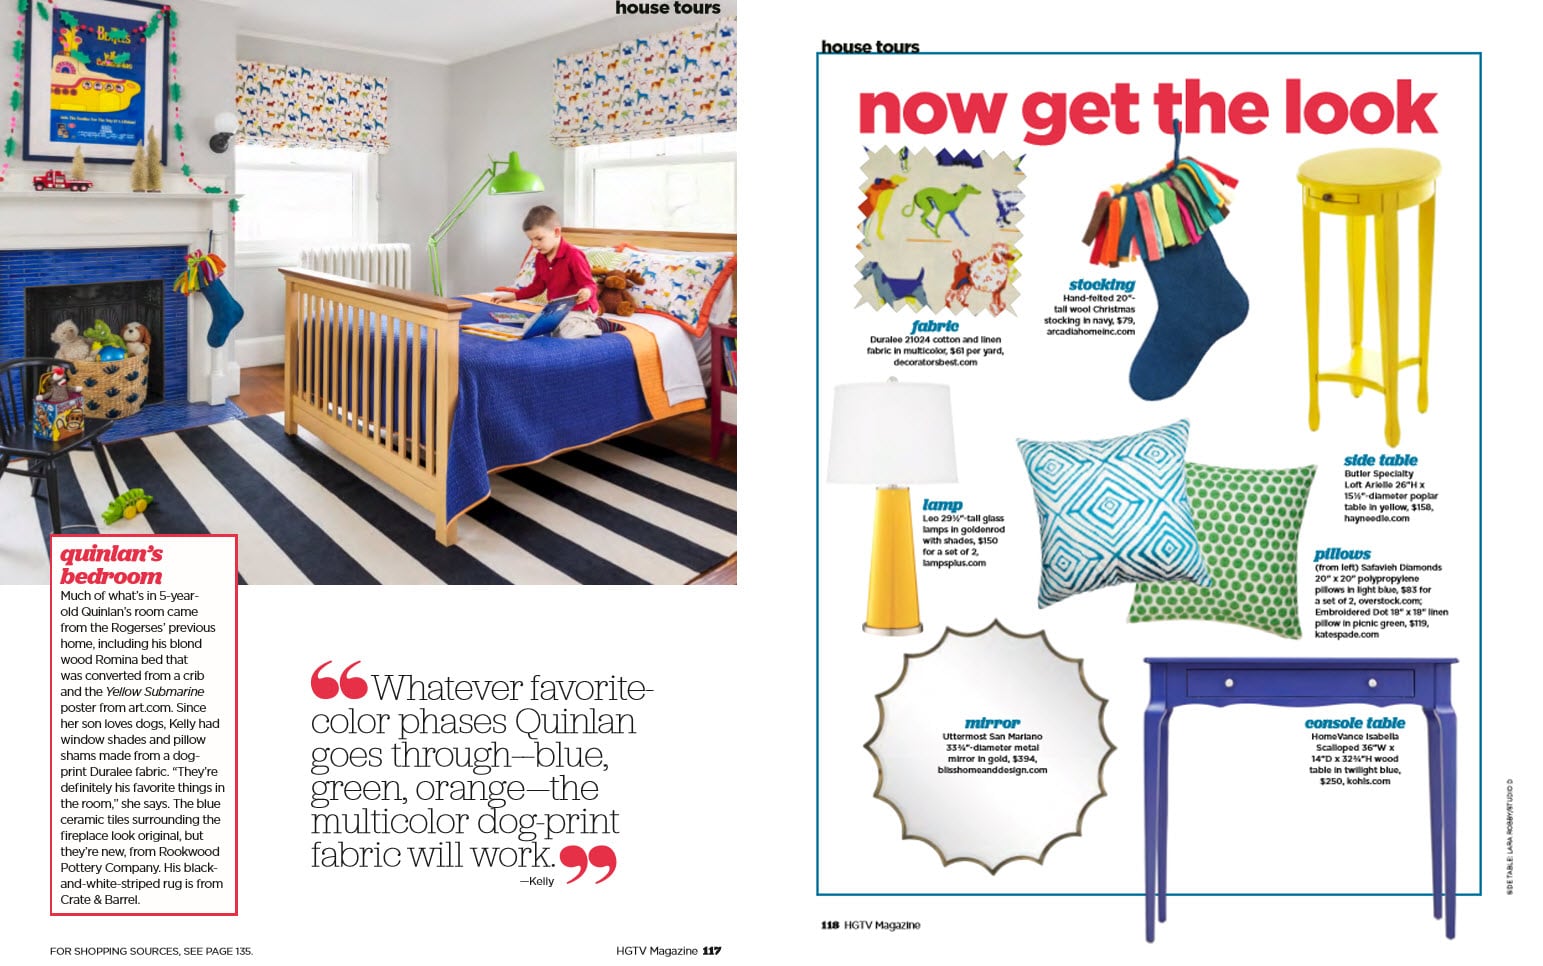
In April of 2016, HGTV Magazine came to photograph our home for their December (holiday) issue that year.
Photography by Annie Schlechter for HGTV Magazine.
They set up the room totally differently, in order to get all of the elements they loved into one single shot.
Here’s how it looked in layout:
I truly can’t believe I am just now sharing this! I think I didn’t initially because of the timing of the magazine feature – everything got embargoed for over a year, and then I just lost track of posting about the project here on the blog. Is the project a tad bit old? Maybe! (We still love it!). But I wanted to still show you, and in doing so share some of my best tips for creating a nursery that can easily transition into a big kid bedroom that will be fun and age-appropriate for many years to come.
- Lay out the room with the next phase in mind. Don’t make it hard on yourself by placing the furniture where literally everything will need to be moved when they grow out of their crib. They’re only in the crib for a couple of years – maybe three, if you’re really lucky! They’ll be in the big bed for many more years. Think more about that second phase and how the bed will fit in the room, and what the layout (and furnishings) will be when you make the transition.
- Get the toddler bed conversion kit, skip the full size. I have done both – by accident, but I had actually intended to do the full bed conversion with Quinlan, just later. I realized with Eamon that the style I like in a crib might not be the style I would want for his more permanent big boy bed. So I took a step down in quality (still good, just not ‘exceptional), knowing it would have a more limited lifetime. I am not one to recommend disposable furniture, but cribs are different. They often get damaged, or regulations and safety recommendations change over time, so they often can’t be sold or handed down. The toddler bed buys you a little time, and is a good transition into an adult-sized bed.
- Aim for whimsical, not juvenile, for the major decorative elements. Again, the nursery phase is fleeting – do you really want to have to fully redecorate the space in 2-3 years? (Or possibly worse, listen to your big kid complain about all the baby things?) Maybe you do, and that’s great! I personally would rather focus on other projects in my home that need attention (such as all of my bathrooms, with the exception of our new powder room). Whimsical is always appropriate for kids, but can also work for young adults (and old adults too, ahem…whimsy is an important element in most of my design work!). If you really want to add more baby and toddler-oriented items, I would suggest doing so with smaller pieces that are easier to switch out – like pillows, accessories, certain types of art, etc. Window treatments, custom bedding, and major pieces of furniture (except the crib, and possibly a glider or rocker) should all be able to stand the test of time. Quinlan loves dogs, and I know he always will. This made the custom window treatments, which we still love five years after they were installed, a great choice for us.
- Think about your lighting plan and how it will work five, ten, or more years from now. It won’t be long and they’ll be reading and possibly doing homework and other solo activities in their bedroom. I added wall lighting in two different places in Eamon’s room with the future in mind. The room didn’t have any wired wall or ceiling lighting at all when we moved in (not uncommon for homes built in the 19th century, and even later). I’ll explain more of my initial plan, and how it turned out four and a half years later, in my ORC reveal on Thursday!
- Leave room for your child to grow into the room. Try to have excess capacity for more things. If you haven’t had children before, you will not believe the stuff that they accumulate over time. Books, toys, trinkets, gadgets are everywhere. If you have the room, buy a bigger bookcase than you think you need. Leave some space on the walls to add more art and wall decor. I laid out the gallery wall above Quinlan’s bed with the thought that it would expand and grow over time, and I now have three very personal pieces that are waiting to be added to it. Kids love to personalize their spaces. Keep some space open for them to be able to do so.
And don’t forget to come back on Thursday for the big reveal of Eamon’s big boy bedroom transition, which I dubbed “American Evolution,” since it wasn’t a total re-do…and there is a distinctly patriotic vibe (which is hard to avoid when you put an 8×10 American flag rug on the floor!). I’m excited to show you what I did, and why it really wouldn’t have been that hard, if not for that pesky tight timeframe and deadline! But that’s why we do the One Room Challenge – it is a proven method of getting stuff done, and done to the level of detail and finish that you can be proud of. And hopefully Eamon appreciates it! 🙂
Photography by Eric Roth, except where otherwise noted.